
Section 03 · Base Camp
03Finding Your Way Around
The CRM has one layout that never changes: a navigation rail down the left, a row of tools across the top, and your work in the middle. Learn these three areas once and you'll never feel lost. This section also covers the list views — the searchable, filterable tables you'll use to work through your leads.
The left navigation rail
The rail is grouped so the things you use together sit together:
- Selling & coaching: Pursuits, Opportunities, Coaching, Dashboards, Companies, Contacts.
- Day-to-day comms: Inbox, Calendar, Tasks, Activities.
- Admin (only if your role includes it) and, for team leads, Team Inbox and Email Reports.
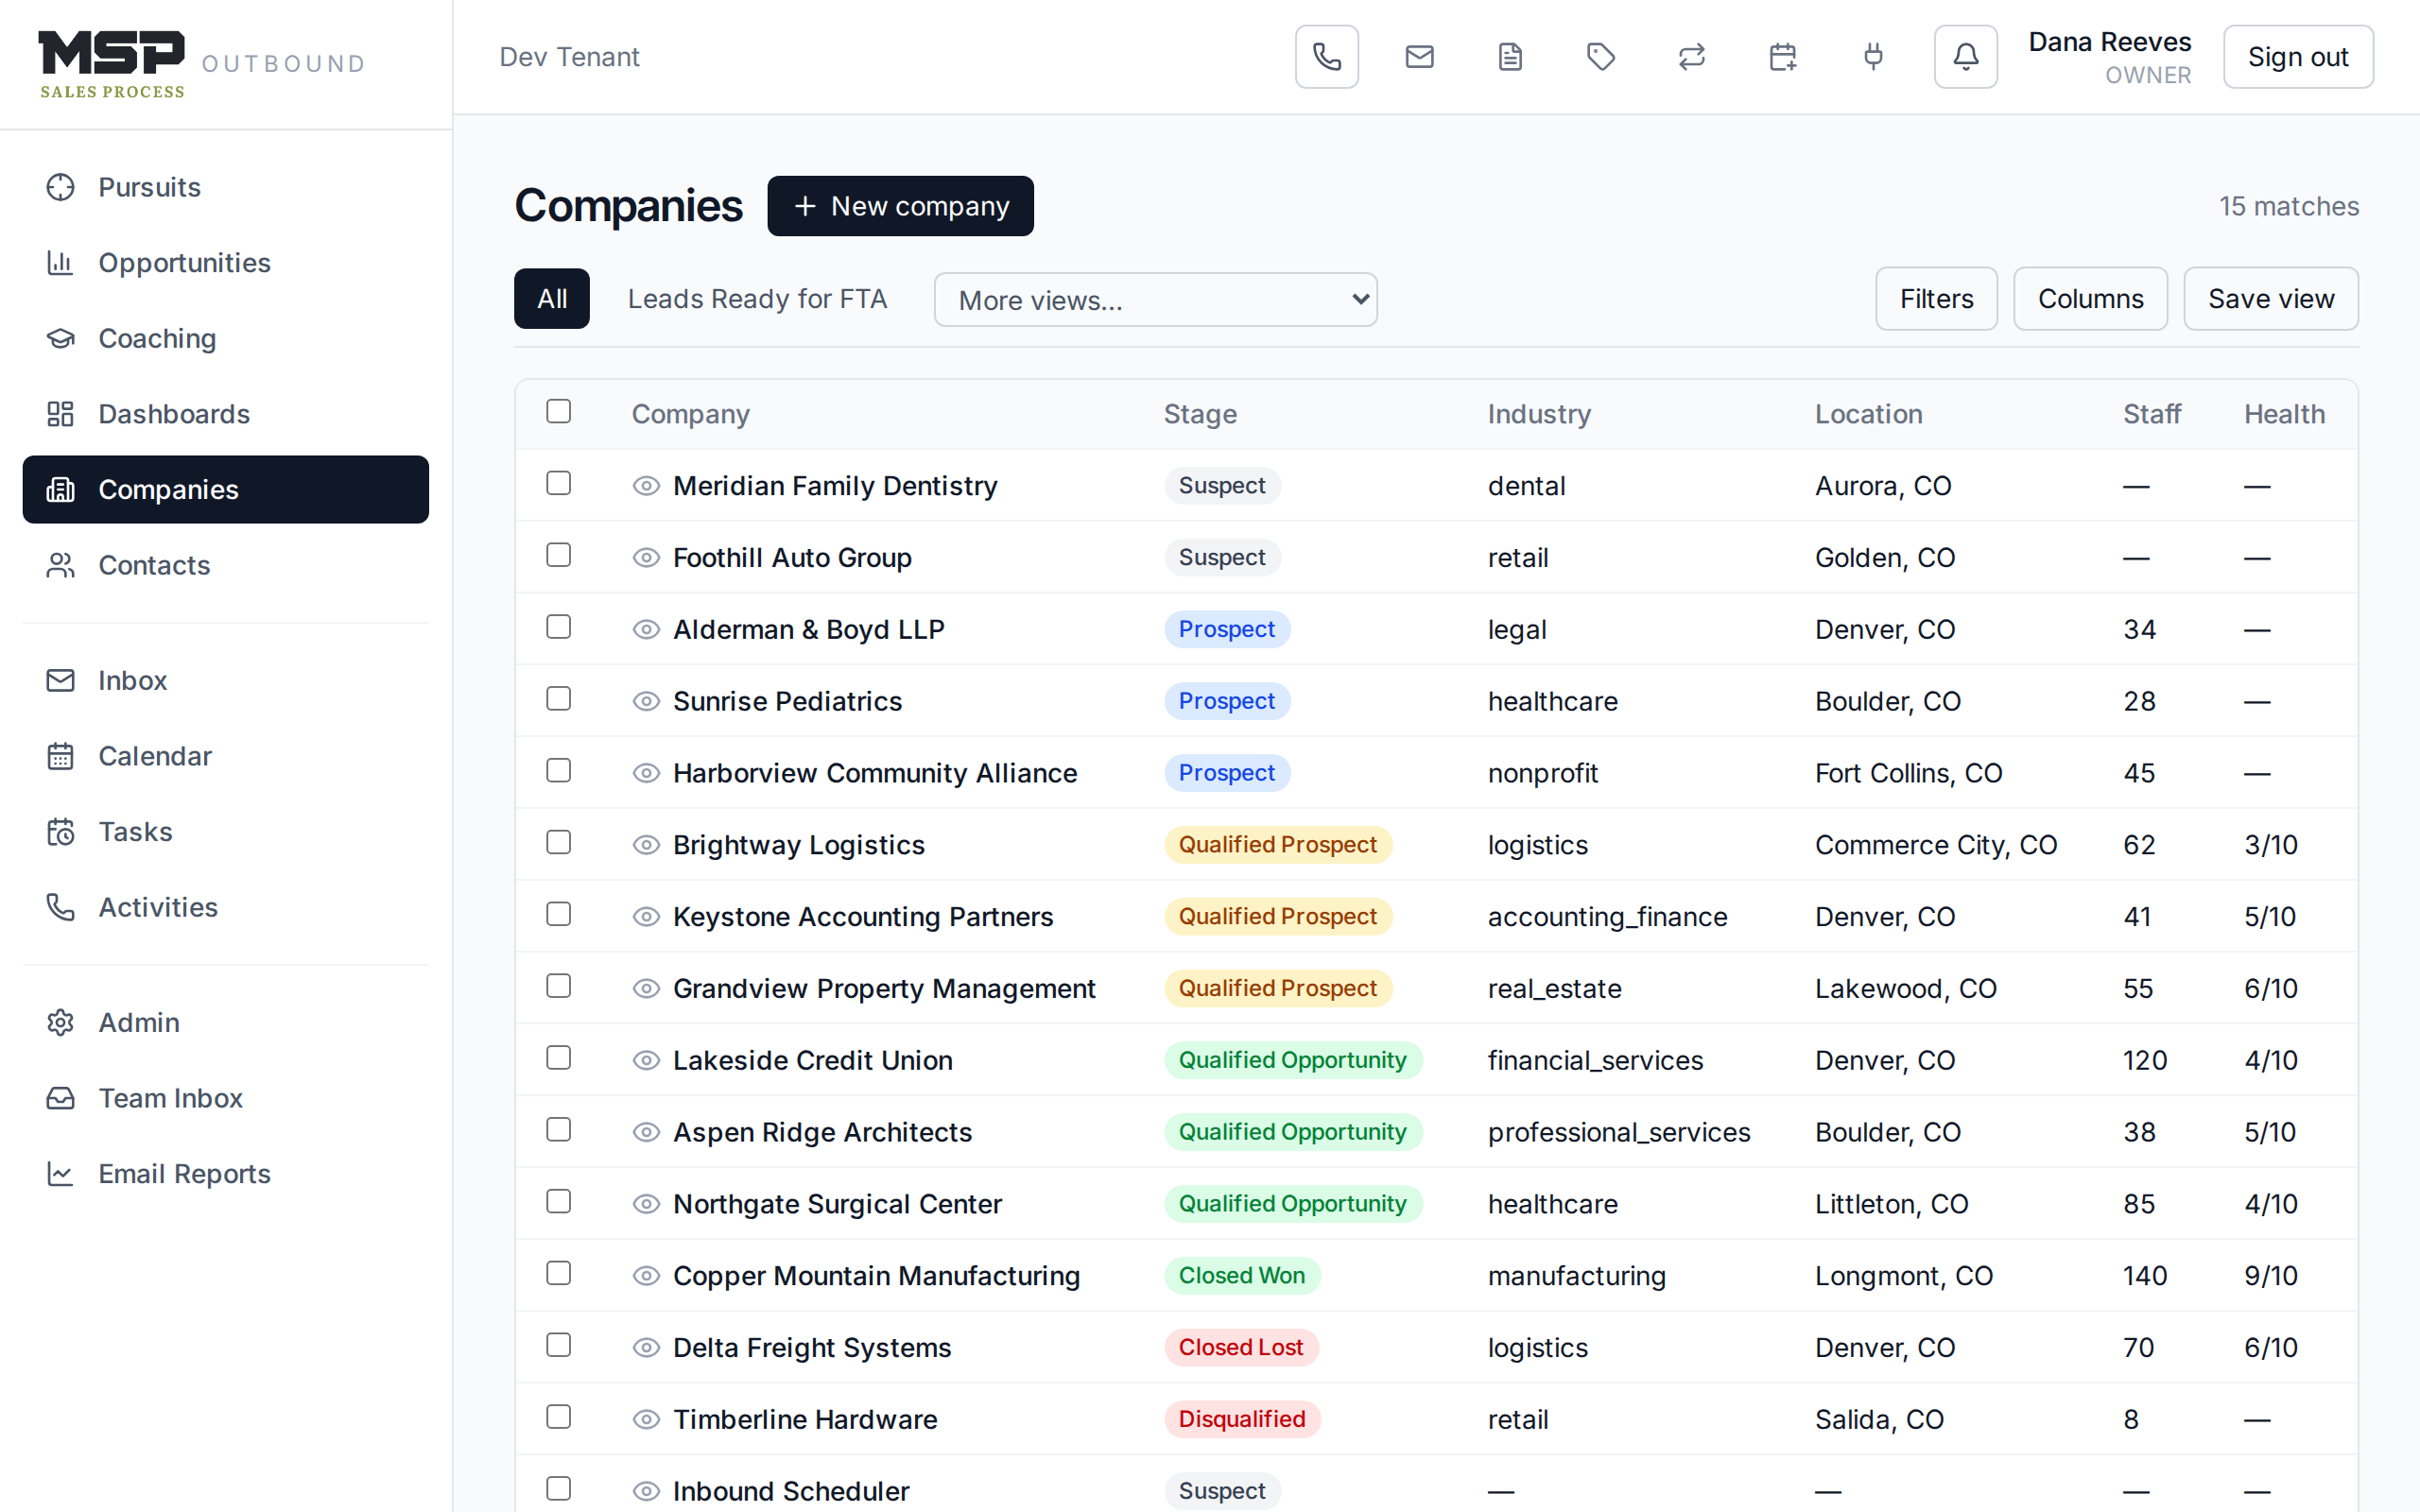
Figure 3.1The standard layout: navigation rail (left), tool bar (top), and your work (center).
The top toolbar
The icons across the top are quick access to tools you reach from anywhere:
| Icon | What it opens |
|---|---|
| Phone | The dialer (Section 07). |
| Your email settings and signature. | |
| Document | Your email templates (Section 10). |
| Tag | The labels catalog. |
| Repeat | Email sequences (Section 10). |
| Calendar-plus | Your Scheduler page settings (Section 11). |
| Plug | Integrations — connect email & calendar (Section 02). |
| Bell | Notifications (see below). |
List views: your working tables
Companies, Contacts, Pursuits, Opportunities, Tasks, and Activities all use the same kind of table. Everything you can do to one, you can do to the others.
Filtering
Click Filters to narrow the list. Each condition is a field, an operator, and a value — for example Stage · is · Qualified Prospect. Add as many as you like; the match selector lets you require all conditions or any of them. Click Apply to run it.
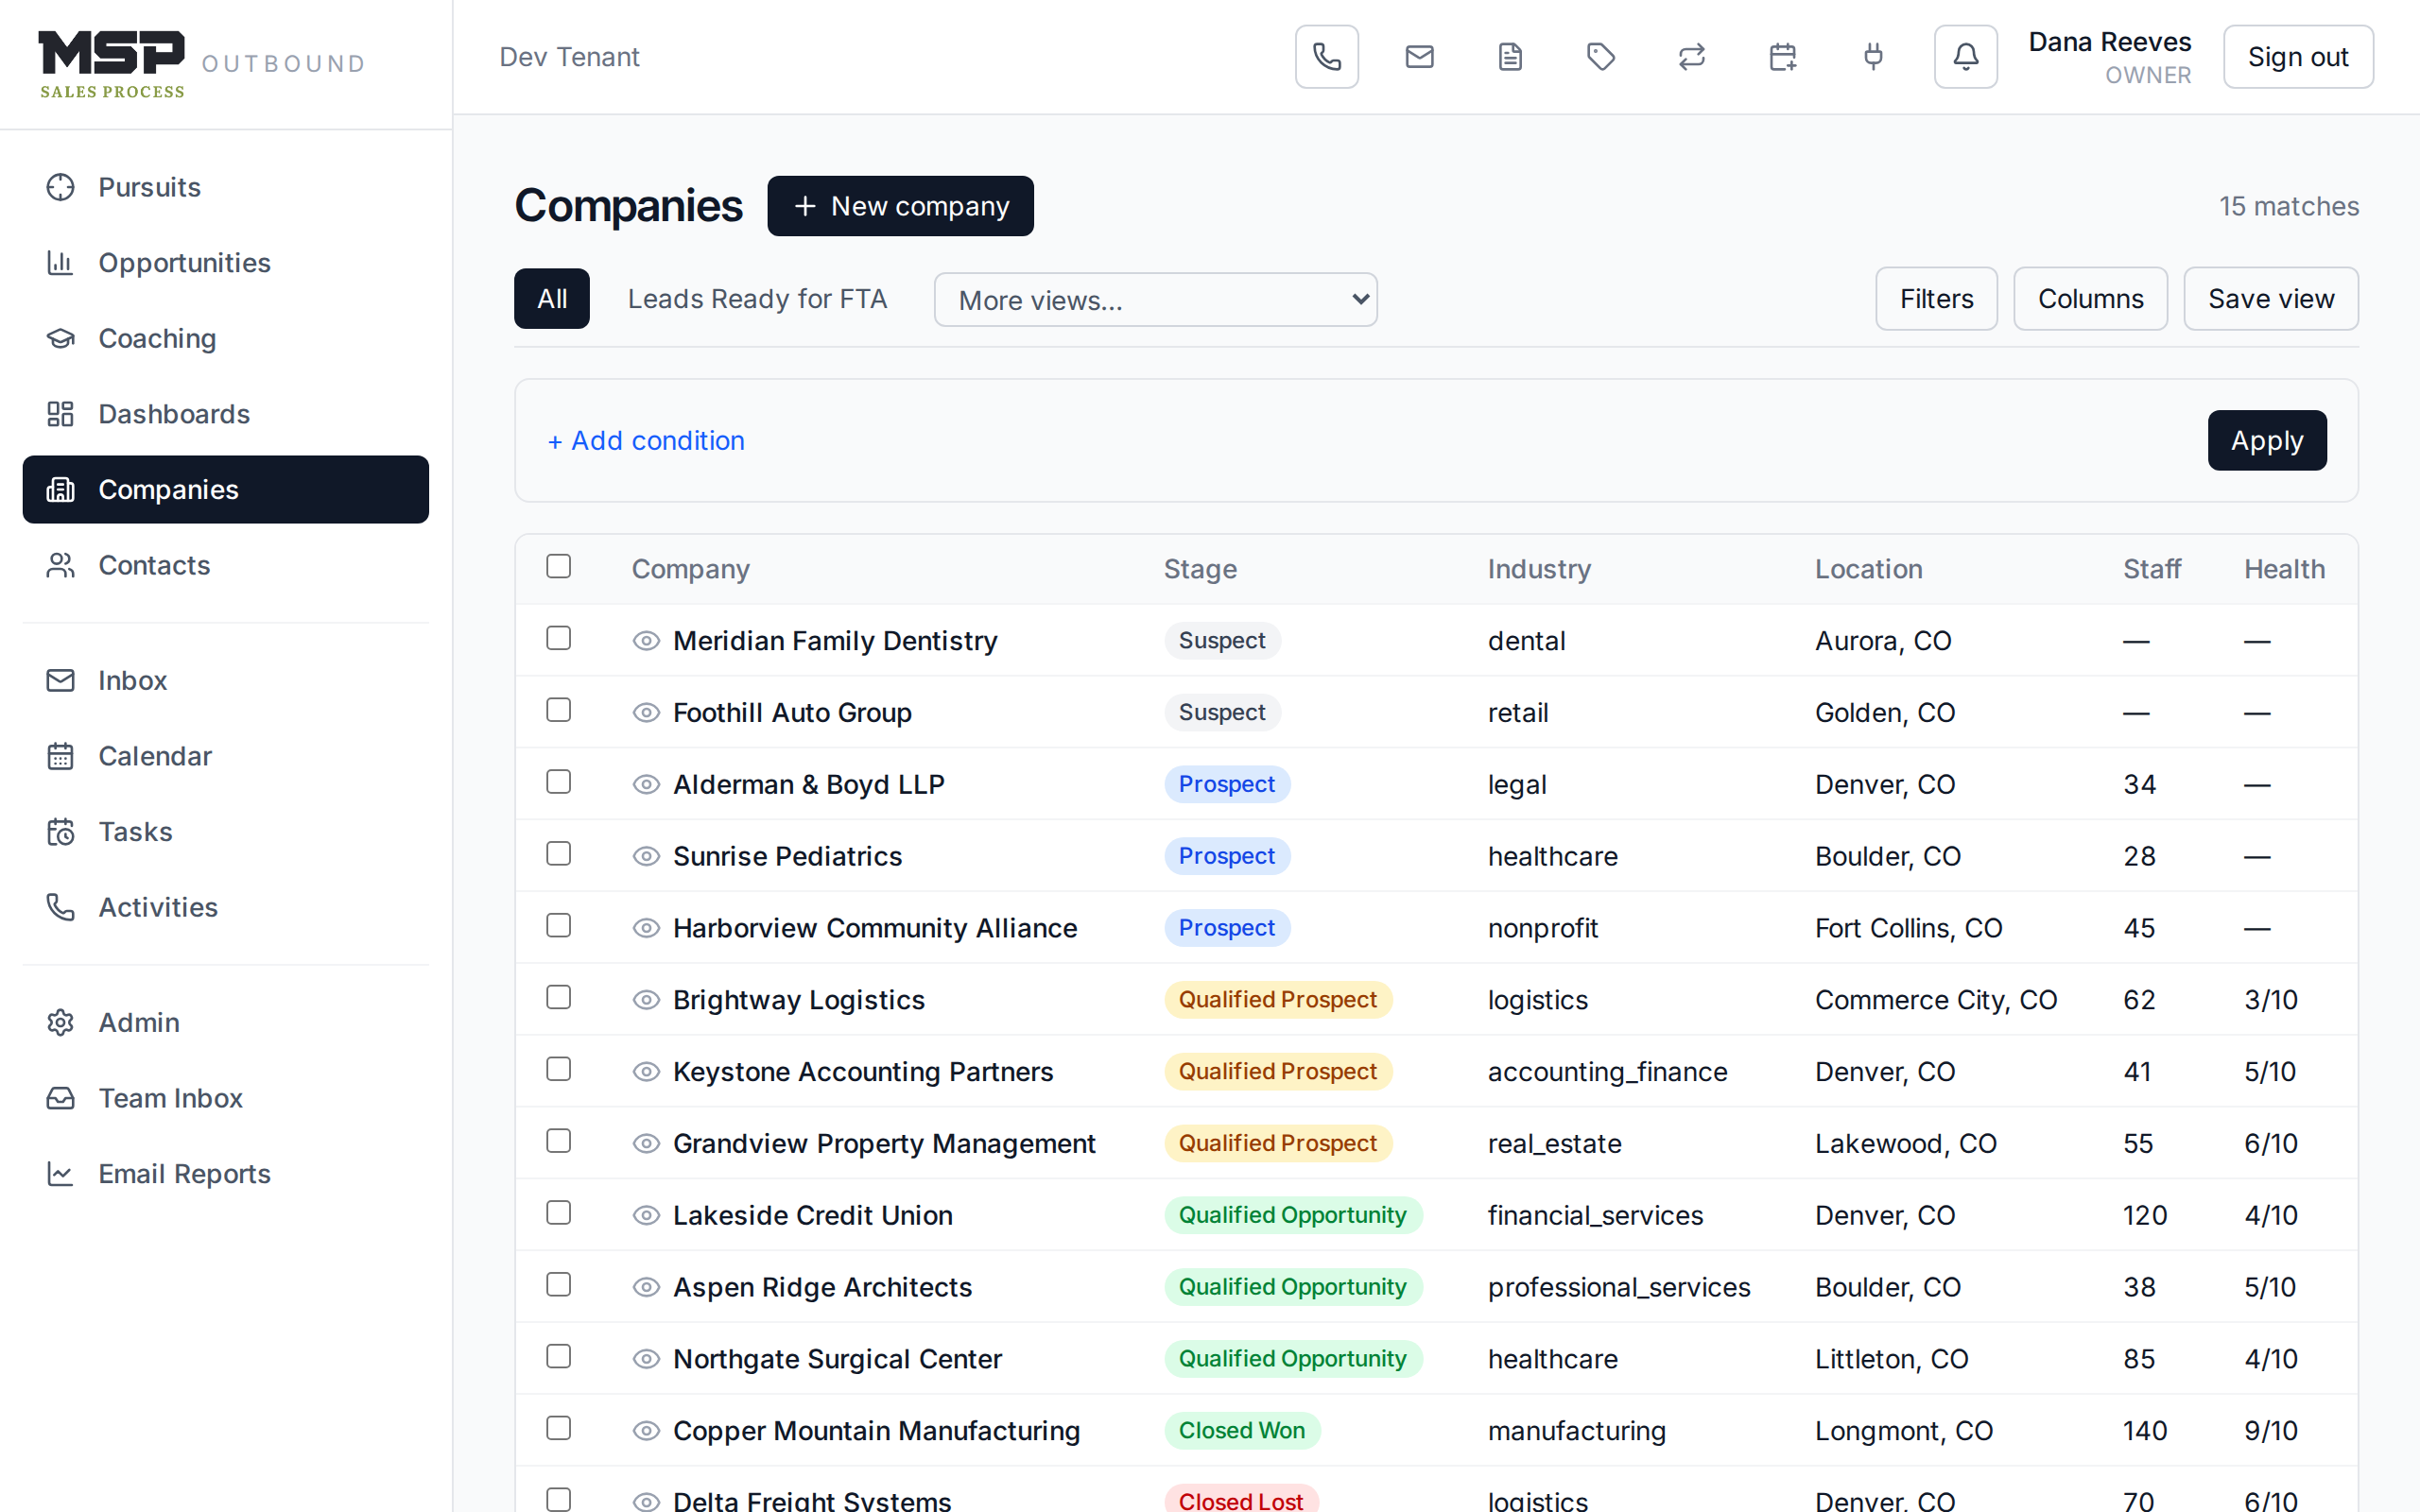
Figure 3.2The filter builder. This example finds every Qualified Prospect ready for an appointment.
Saved views
Once you've built a filter you use often, click Save view and name it. It becomes a tab across the top of the list. The Intensive taught one you should build first: "Leads Ready for FTA" — Qualified Prospects with a known decision maker, a contract end date, and their IT method captured. Saved views can be kept private or shared with your team.
Columns, sorting, and paging
Use Columns to choose what shows; click any column header to sort by it; and use the Rows per page control at the bottom to page through longer lists.
Bulk actions
Tick the checkboxes on several rows and an action bar appears — you can label them, assign an owner, enroll them in a play, or delete them all at once. Deleting moves items to the recycle bin, where a manager can restore them; nothing is gone for good by accident.
The quick-peek
On the Companies list, click the small eye icon next to a name to slide open a summary of that account without leaving the list — handy for a fast look before you decide to open the full record.
Notifications
The bell in the top bar lights up when something needs you — a coaching nudge, a task coming due, or an email that's waited too long for a reply. Click it to see the list, and click any item to jump straight to it.
Good to know
There's no separate "search everything" box. Searching happens inside each list — open Companies and filter, open Contacts and filter, and so on. Saved views are how you turn a search you repeat into one click.
The bottom line
One layout, learned once.
Rail on the left, tools on top, work in the middle. Master the list views — filter, save, act — and the whole system opens up.